The One Bike That Does It All: A Beginner’s Guide to Gravel Bikes
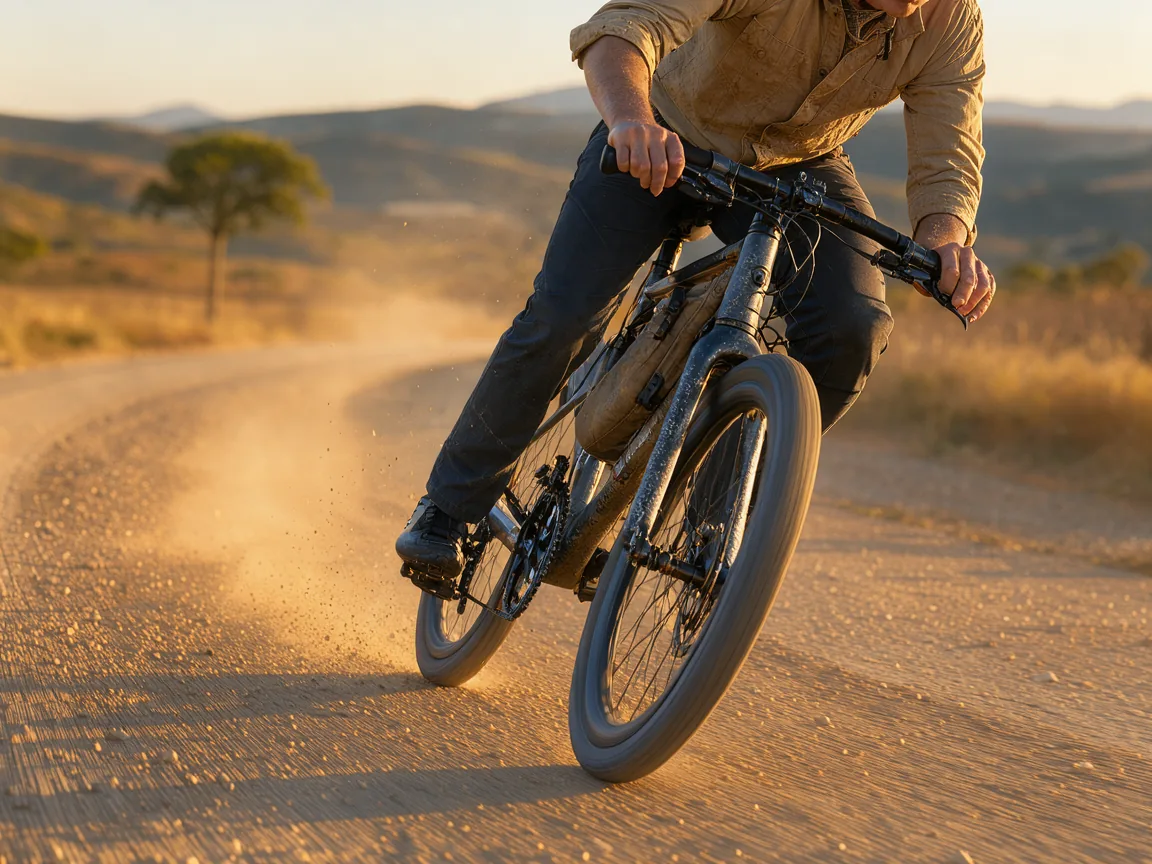
Picture a bike that carves through loose gravel, glides over pavement, climbs steep fire roads, and handles light singletrack with equal confidence. That’s a gravel bike—the ultimate gateway for riders who refuse to stick to one surface. This guide cuts through the noise, breaking down what truly separates gravel bikes from road, mountain, and cyclocross models. We’ll cover the essentials—geometry, tires, brakes, drivetrains, and mounting points—so you can pick your first do-it-all bike with clarity. By the end, you’ll know exactly what to look for and why this one machine might be all you ever need.
The Basic Definition of a Gravel Bike
A gravel bike is a drop-bar bicycle built for unpaved surfaces—dirt roads, fire trails, packed gravel—while still rolling efficiently on tarmac. It sits between a road bike and a mountain bike, blending the speed and pedaling efficiency of the former with the tire clearance and stability of the latter, minus heavy suspension. You can ride from your front door to a forest trail, then push on into rugged backcountry, all on one bike. For riders who value versatility over specialization, it’s the ultimate do-it-all machine.
What Makes It Different From a Road Bike
The key differences come down to tire clearance, geometry, and braking. Gravel bikes accommodate much wider tires—typically 35mm to 50mm or more—compared to the 25mm to 32mm on road bikes. That extra width allows lower pressures for better traction and shock absorption on loose or uneven ground. The geometry is more relaxed too: a longer wheelbase, slacker head tube angle, and taller front end put the rider in a more upright, stable position. It cuts fatigue on long, bumpy rides, though it sacrifices the aggressive, aerodynamic tuck road bikes favor. Gravel bikes also come almost exclusively with disc brakes—mechanical or hydraulic—for reliable stopping power in wet, muddy, or dusty conditions. Rim brakes, common on road bikes, can’t handle the grit and moisture off-road. While road bikes chase every gram and watt for smooth tarmac, gravel bikes trade a bit of speed for comfort, control, and the confidence to explore.
What Makes It Different From a Mountain Bike
The contrast with mountain bikes is just as clear. Gravel bikes typically have no suspension, or at most a short-travel front fork (around 30mm to 40mm) to smooth out chatter. Mountain bikes, by comparison, pack 100mm to 170mm of travel front and rear to absorb big hits from roots, rocks, and drops. Gravel tires are narrower—35mm to 50mm—versus the 2.2-inch to 2.5-inch knobby tires on mountain bikes. That means gravel bikes roll much faster on hardpack and pavement, but offer far less cushioning and grip on technical terrain. Handlebars differ fundamentally as well: gravel bikes use drop bars for multiple hand positions and a more aerodynamic tuck, while mountain bikes use flat or riser bars for maximum leverage and control on steep descents. In practice, a gravel bike is built for sustained pedaling over smoother off-road surfaces like logging roads and rail trails—not aggressive singletrack, jumps, or rock gardens. It will carry you across a gravel path at speed, but it won’t forgive a mistimed drop-off the way a full-suspension mountain bike would.
Frame Geometry and Riding Position
The most defining difference between a gravel bike and a road bike isn’t the tire width or the drop bars—it’s the geometry that connects them to the ground. Gravel frames favor a relaxed, endurance-focused posture, prioritizing stability over razor-sharp agility. To understand this, focus on three key numbers: the wheelbase, the head angle, and the bottom bracket height. On a gravel bike, the wheelbase is longer, the head angle is slacker (tilting further back from vertical), and the bottom bracket sits lower relative to the axles. Together, these adjustments lower your center of gravity and spread your contact points further apart—exactly what you need when the pavement ends and the surface turns to loose gravel, hardpacked dirt, or rain-grooved ruts.
Why a Longer Wheelbase Helps
Think of the wheelbase as the distance between the front and rear axles. A longer one—typically a few centimeters more than a comparable road bike—acts like a stabilizer fin. At speed, it keeps the bike planted, resisting the side-to-side sway loose stones can induce. More importantly, it changes behavior under load. Climbing a steep, slippery grade, a longer wheelbase reduces the rear wheel’s tendency to lift as you shift weight forward. It also makes the bike far less twitchy with a handlebar bag or frame pack strapped on; the extra length mutes steering inputs, so you’re not constantly fighting a nervous front end through deep, dragging gravel.
The Role of a Slacker Head Angle
The head angle is the angle of the front fork relative to the ground. A slacker one—usually around 69 to 71 degrees on a gravel bike, versus 72 to 74 on a road bike—increases something called trail. Trail is the distance between where the front tire touches the ground and where the steering axis hits that same ground. More trail means the front wheel naturally tracks straight ahead, a huge advantage on loose surfaces. Hit an unexpected rut or a fist-sized rock, and the bike doesn’t dart sideways; it glides over with a calm, forgiving motion. You do sacrifice a bit of quick, race-day steering response, but for a beginner, that trade-off is almost always worth it. The bike feels less like a scalpel and more like a steady, reliable partner, letting you look further down the trail instead of constantly micro-correcting your line.
Tires and Clearance
What truly sets a gravel bike apart isn’t the frame geometry or handlebar shape—it’s the gap between the fork blades and seatstays. This is a machine built to swallow rubber that would never fit inside a road bike’s fork. A standard road bike squeezes in tires from 25 to 32 millimeters wide; a gravel bike typically accommodates 35 to 50 millimeters. That extra volume changes everything. Wider tires let you run lower air pressure, which does two crucial things: it boosts traction on loose surfaces and transforms ride quality by absorbing the constant chatter of dirt, roots, and washboard roads. Instead of feeling every pebble through the handlebars, the tire itself becomes your suspension.
Choosing Tire Width for Your Terrain
There’s no single “correct” tire width—only the one that matches the ground you cover. If your rides lean toward hardpack dirt, well-packed fire roads, and the occasional pavement, a 40-millimeter tire is the versatile starting point. It rolls efficiently, corners predictably, and still floats over soft spots. For those who push into deep gravel, chunky rock gardens, or light singletrack, move toward 50 millimeters. The added volume delivers a larger contact patch and lets you drop pressure for stability without fearing pinch flats. On the flip side, if your gravel bike will split its time between commuting and long road loops, a 35–38-millimeter tire hits the sweet spot. It rolls noticeably faster on asphalt while still offering enough tread and volume for a confident, comfortable ride on packed gravel.
Tubeless Setup and Lower Pressure
Most gravel riders go tubeless—no inner tube, with the tire sealing directly against the rim. A liquid sealant inside the casing instantly plugs small punctures from thorns or flint. Tubeless also unlocks the real benefit of those wide clearances: dramatically lower pressure. On a gravel bike, you can safely run anywhere from 25 to 35 psi, depending on your weight and terrain. At these pressures, the tire deforms over obstacles rather than bouncing off them, increasing the contact patch for grip and spreading impact force for comfort. But there’s a trade-off. Go too low—especially below 25 psi on a heavier rider—and you risk rim damage on sharp impacts, where the tire bottoms out and the metal edge strikes a rock. The ideal pressure is the lowest number that doesn’t produce a harsh “bottoming out” feeling on your test loop. Start high, drop a few psi each ride, and listen for that moment when the ride smooths out without the rim threatening to touch down.
Handlebars and Control
The handlebar is where you and the bike talk, and on a gravel bike, that conversation is built to be confident and forgiving. Like road bikes, gravel bikes use drop bars—the familiar curved shape that lets you shift between an upright cruising position and a low, aerodynamic tuck. But there’s a key difference: the drops often flare outward at the ends. Instead of running straight back toward your knees, the bottom curve angles out slightly, widening your hand position by a few centimeters on each side.
The Benefits of Flared Drops
That flare isn’t just for looks. When you’re descending a loose gravel road at speed or picking through a stretch of embedded rocks and roots, a wider grip gives you more leverage over the front wheel. It’s the same idea as a wider mountain bike bar: your hands act as longer levers, so you steer with subtle inputs instead of wrestling the bar. The flare also keeps your wrists at a more natural, neutral angle when you’re in the drops. On a long, bumpy ride, that reduces the strain that can creep into your forearms if you’re locked into a narrow, straight position. You don’t need to shift your body weight or reach forward—just slide your hands down into the flared section, and you gain control without feeling stretched out.
Alternative Bar Shapes
Not all gravel bikes come with the same handlebar, which is good news for beginners. Many models now feature “gravel-specific” bars with a shorter reach and shallower drop than traditional road bars. Reach is the horizontal distance from the stem to the bend; a shorter reach means you don’t have to lean as far forward to hold the drops. A shallower drop means the lower position isn’t so low that it feels cramped or aggressive. Together, these tweaks make the bike far more approachable if you’re new to drop bars—you still get all the hand positions, but without feeling like you’re stretching into a racing pose.
If you try a gravel bike and decide drop bars aren’t for you, there’s another option: swap to a flat bar. This gives you mountain-bike-style steering with your hands straight out, which can feel more intuitive and upright. But be aware—it changes the bike’s character. The cockpit gets shorter, handling feels quicker and twitchier, and you lose the aerodynamic tuck that helps against headwinds. It’s a viable customization, but most riders find that a well-fitted flared drop bar offers the best blend of comfort, control, and versatility—exactly what a gravel bike is meant to deliver.
Brakes and Stopping Power
Gravel riding throws you into a chaotic mix of surfaces: loose dirt, slick clay, wet roots, and rain-slicked pavement. In those conditions, your brakes are your most critical safety tool, and nearly every gravel bike on the market today uses disc brakes. Traditional rim brakes squeeze the wheel’s rim, but they lose grip when water or mud coats the metal. Disc brakes, by contrast, clamp onto a dedicated rotor mounted at the wheel’s hub, keeping stopping power consistent no matter how filthy or soaked the conditions get. On a long, muddy descent, that reliability is the difference between a controlled stop and a skidding panic.
Mechanical vs. Hydraulic Disc Brakes
You’ll encounter two main types of disc brakes. Mechanical disc brakes use a steel cable—similar to a traditional brake cable—to pull the caliper and squeeze the rotor. They’re straightforward to adjust with a simple barrel adjuster, and if a cable snaps or stretches on a remote gravel road, you can fix them with basic tools and a bit of patience. Hydraulic disc brakes use fluid-filled lines to transfer force. When you squeeze the lever, the fluid pushes the pistons with more even pressure, giving you finer modulation and more raw stopping power with less finger effort. However, they require specialized bleed kits and a careful process to service, which usually means a trip to a bike shop. For a beginner, mechanical brakes are easier to live with; for anyone planning steep, loaded descents, hydraulic is the performance upgrade.
Rotor Size and Heat Management
The rotor’s diameter directly affects how well your brakes handle heat. On a long, steep gravel descent, constant braking generates significant heat, which can cause brakes to fade—a temporary loss of stopping power. Larger rotors, typically 160mm or 180mm, have more surface area to dissipate that heat, keeping performance steady even under heavy loads or with a fully packed bikepacking rig. Smaller rotors are lighter, but they heat up faster. For most beginners riding unladen on varied terrain, 160mm rotors offer the best balance: enough heat capacity for typical gravel climbs and descents without the extra weight and slightly slower wheel response of a 180mm rotor. If you plan to carry heavy gear or ride aggressively in the mountains, consider upgrading to 180mm up front, where most braking force occurs.
Drivetrain Options
When you begin exploring gravel bikes, the drivetrain is often the first spec that jumps out. Road bikes have settled on double chainrings, and mountain bikes have largely gone single-ring, but gravel bikes occupy a fascinating middle ground. The drivetrain you pick fundamentally shapes how the bike feels, shifts, and performs across the mixed terrain gravel riding is known for. Broadly, you have two architectures: 1x (one chainring up front) and 2x (two chainrings). Neither is objectively better; the right choice hinges on your riding style, terrain, and priorities.
1x Setups for Simplicity
A 1x drivetrain does away with the front derailleur entirely. Up front sits a single chainring, often with a narrow-wide tooth profile to keep the chain secure. Out back, a wide-range cassette—typically 10, 11, or 12 gears—delivers a surprisingly broad spread of ratios. The main draw is simplicity. Without a front derailleur to adjust or misalign, shifting is intuitive and one-handed: just click through the rear gears. This setup is also known for fewer chain drops, especially on rough terrain where a front derailleur can snag and toss the chain. Maintenance is easier too, with one less part to clean after a muddy ride. The downside? Gear jumps are bigger. On a steep, loose climb with a loaded bike, you might crave a lower granny gear that a 1x can’t offer without sacrificing top-end speed on pavement.
2x Setups for Range
If your gravel rides involve long paved stretches, fast group spins, or brutally steep off-road climbs, a 2x drivetrain is worth a look. With two chainrings up front—usually a compact or sub-compact pair—and a standard rear cassette, you get a much wider overall range. You can spin a low gear up a 15% dirt grade, then shift to a high gear for a 30 mph tarmac descent, all with smaller, more incremental steps between gears. Those finer steps help maintain a steady cadence on rolling terrain, where the perfect gear is often just one click away. The trade-off is complexity: a front derailleur, a second shifter, and more careful setup. There’s also a slightly higher risk of chain drops in rough conditions, and shifting the front ring demands more thought and timing. Still, for many riders, that mechanical nuance is a small price for the versatility a 2x unlocks. Ultimately, test ride both if you can—your legs and local terrain will tell you which philosophy fits best.
Mounting Points and Versatility
A gravel bike’s real strength isn’t any single part—it’s how many ways you can make it yours. Where a road bike is often stripped to the essentials, a gravel bike is a blank canvas. That flexibility comes from a web of threaded eyelets and mounts across the frame and fork. These tiny holes might look unassuming, but they turn a weekend toy into a commuter, a tourer, or a long-haul expedition rig.
Racks and Fenders
Carrying more than a small backpack? You’ll need a rack. Check the rear stays—the tubes linking the axle to the seat tube—and the dropouts where the wheel sits. Threaded eyelets there anchor a rear rack, so you can bolt on panniers for commuting or grocery runs. The front fork often adds eyelets at its tip and mid-leg, letting you fit a low-rider rack for balanced cargo up front. Those same eyelets secure full-coverage fenders, or mudguards, which keep spray off your back and drivetrain in the wet, making the bike a true all-weather workhorse. Many modern frames go a step further with hidden mounts—flush bolts that vanish when unused. The bike keeps its sleek, sporty lines, yet you can add racks or fenders in minutes when duty calls.
Bottle Cages and Frame Bags
Hydration is a must on any ride past an hour. Most gravel frames come with two sets of bottle bosses: one inside the main triangle, one on the downtube. Adventure-focused models push further, adding a third set under the downtube for a tool roll or extra bottle. Perhaps handiest of all is the top tube mount, which lets you bolt on a bag for your phone, snacks, or a mini pump within arm’s reach. Some forks even sport side mounts for strapping a dry bag with extra clothes or camping gear. With water and tools riding on the frame, you skip the backpack’s sweat and strain, keep your center of gravity low, and enjoy stable, all-day handling.
Suspension and Comfort Features
Gravel bikes aren’t mountain bikes, but that doesn’t mean they’re harsh. The category began with rigid frames and skinny tires, yet modern designs pull comfort ideas from both road and mountain disciplines to keep you fresh over long, unpaved miles. Some models feature a front suspension fork with 30–50mm of travel—enough to tame washboard roads without turning the bike into a trail sled. Others skip suspension altogether, leaning on flexible seatposts, wider tires, or vibration-damping frame materials to smooth the ride. The result? A spectrum of comfort options, so you can match the bike to the terrain you actually ride.
Front Suspension Forks
A short-travel fork, typically 30–50mm, is the closest most gravel bikes get to mountain bike territory. That modest travel is deliberately tuned to absorb high-frequency chatter—corrugated dirt roads, loose gravel over hardpack, shallow roots—rather than big drop-offs. It does so without adding much weight or slowing you on pavement, which is the key trade-off. A suspension fork also keeps your front wheel planted on rough descents, boosting traction and control when you’re navigating loose switchbacks or rolling over cattle grids. If you regularly ride light singletrack or gravel roads that haven’t been graded in months, this is a worthwhile upgrade. The downside: added maintenance and a slightly taller front end, which alters the bike’s handling compared to a rigid fork.
Rigid Forks and Compliance
Most gravel bikes, however, come with rigid forks. That’s not a compromise—it’s a design philosophy. With a rigid fork, comfort comes from three sources: tire volume, frame construction, and component choice. Wider tires, typically 40–50mm, can run at lower pressures to absorb bumps before they reach your hands and saddle. The frame itself matters too. Carbon forks and seatposts excel at absorbing high-frequency vibration—the kind that causes hand numbness and back fatigue on long rides. They flex slightly under load, dampening road buzz in ways aluminum cannot. The catch is cost: carbon components add €200 to €600 to a bike’s price compared to alloy equivalents. On a budget? Aluminum frames with larger tires and a suspension seatpost—like a dropper post with built-in travel—can deliver 80% of the comfort for a fraction of the price. The real trick is to test ride a few setups, because compliance is a subjective feel, not a spec sheet number.
How to Choose Your First Gravel Bike
Choosing your first gravel bike boils down to three honest questions: where will you ride most, what can you comfortably spend, and do you plan to carry luggage on overnight trips? The answers shape everything else. Start by listing the surfaces you’ll tackle—smooth canal paths, rutted forest tracks, or a mix of pavement and dirt—since that dictates how much tire clearance and suspension you need. Then, test ride at least three models from different brands. You’ll immediately feel geometry differences: some bikes boast a longer wheelbase for stability at speed, while others feel snappier and more agile in tight corners. Pay close attention to the space between tires and frame; more clearance means you can fit wider tires later, which transforms comfort on rough ground.
Budget Considerations
Gravel bikes span a wide price spectrum, and knowing where your budget lands prevents disappointment. Entry-level models typically range from $800 to $1,500 per bike, featuring reliable components and aluminum frames that handle everyday abuse. Mid-range options from $1,500 to $3,000 per bike add lighter wheels, better shifting, and more refined geometry. Above $3,000 per bike, you’re paying for carbon frames, premium groupsets, and weight savings that matter mainly to racers. Remember to set aside extra for pedals, a helmet, and basic repair tools—these add roughly $150 to $300 to your total, so factor them into your initial figure.
Fit and Sizing
Gravel bikes place you in a more upright position than a traditional road bike, meaning your usual road bike size might not translate directly. Many riders size down for a more relaxed, confident posture, especially when descending loose gravel. If possible, book a professional bike fit—it’s worth the investment to avoid knee pain and numb hands. Alternatively, use the manufacturer’s size chart as a starting point, then fine-tune with stem length and saddle height adjustments. A bike that’s too large will feel unwieldy; one that’s too small will cramp your legs and back.
Frame Material Choices
Aluminum is the pragmatic choice for beginners: affordable, durable, and light enough for daily riding. Steel offers a smoother, more forgiving ride and can be repaired by any local welder, though it adds weight. Carbon is featherlight and stiff, transferring power efficiently, but it costs significantly more and requires careful handling. Titanium sits at the premium end—luxuriously smooth and nearly indestructible—but you’ll rarely find it on a beginner bike. For your first gravel bike, aluminum or steel gives you the best balance of cost, resilience, and upgrade potential.
The Bottom Line
A gravel bike is the most versatile drop-bar bike you can buy. It blends road bike speed with mountain bike stability, so pavement, dirt, and light trails all feel equally confident and comfortable. For beginners, that means one bike covers commuting, weekend adventures, and fitness—no stable of specialized machines required. The key takeaway? Gravel bikes remove the guesswork. You can turn down any road, path, or fire lane without worrying if your equipment is up to the task. Your next step is simple: test ride a few models. Feel how wider tires and relaxed geometry translate into everyday ease, then pick the one that makes you want to ride more. Whether you’re chasing a smoother commute or your first off-road miles, a gravel bike is the single smartest place to start.