The Gravel Tire Width Guide: Find Your Perfect Fit
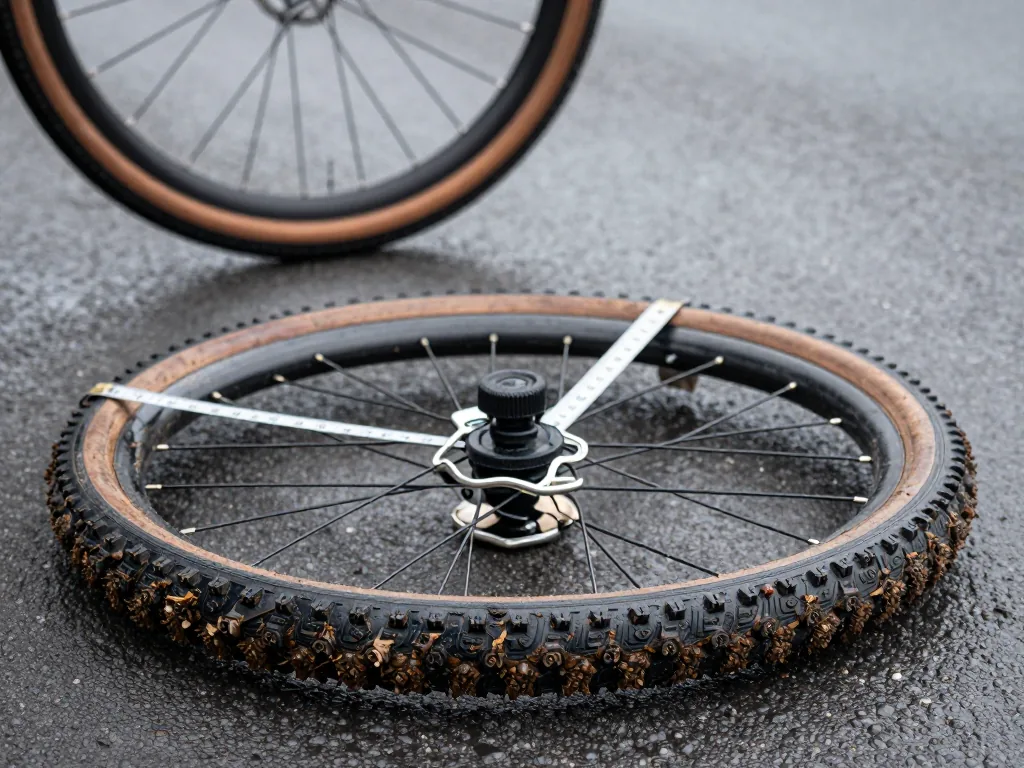
Choosing the right gravel tire width can transform your ride—or ruin it. Too narrow, and you’ll bounce over rough terrain; too wide, and you’ll drag through mud and struggle on climbs. This guide walks you through every factor that determines the ideal gravel tire width, from frame clearance and rim compatibility to terrain, pressure, and tread. You will learn how to match width to your riding style, avoid common fit mistakes, and make an informed upgrade decision. By the end, you’ll know exactly which size unlocks your bike’s true potential.
Understanding Gravel Tire Width Basics
Gravel tires typically span 35mm to 50mm, with 40mm serving as the most versatile all-around width. Width directly influences how your bike feels on pavement, dirt, and loose gravel, so choosing a number without context often leads to frustration. The range exists because gravel isn’t one surface—it’s a spectrum from smooth fire roads to chunky alpine descents, and your tire width is the primary dial for tuning that experience.
The Standard Range and Why It Matters
- 35–38mm: Faster on hardpack and pavement, lighter, but less cushioned. These tires suit riders who split time between tarmac and groomed gravel paths. They accelerate quickly, corner crisply on firm surfaces, and keep your overall bike weight down. The tradeoff is a harsher ride over roots, rocks, and washboard sections where the lack of volume becomes noticeable.
- 40–42mm: Balanced for mixed terrain, most common choice. This is the sweet spot for riders who encounter a genuine mix—paved connectors, packed dirt, and occasional loose sections. At this width, you get enough air volume to run moderate pressures for comfort, while still maintaining respectable speed on smoother stretches. It’s the width most manufacturers spec on all-road and gravel bikes for good reason.
- 45–50mm: Maximum stability and shock absorption, slower on smooth roads. These wide tires transform your bike into a terrain-munching machine. They float over sand, grip loose climbs, and provide a plush ride that reduces fatigue on long, rough days. The penalty comes on pavement, where the increased contact patch creates noticeable rolling resistance and slower acceleration.
How Width Affects Tire Pressure and Ride Quality
Wider tires allow you to run lower air pressure without risking pinch flats, which increases traction and comfort. The larger air volume acts as your primary suspension system—it deforms over obstacles, keeps the tread in contact with the ground, and absorbs vibrations before they reach your hands and saddle. On a 45mm tire, pressures around 25–30 psi (front) and 28–33 psi (rear) for most riders offer a supple, confident feel on loose terrain.
Narrower tires need higher pressure to avoid rim damage and rolling resistance, but that pressure reduces grip and vibration damping. A 35mm tire typically requires 40–50 psi to protect the rim from impacts, which transmits every sharp edge directly into the frame and your body. The higher pressure also reduces the tire’s footprint, meaning less traction on loose gravel where you need the tread to bite. Finding your ideal width is therefore not just about clearance—it’s about finding the pressure range where your bike feels planted, comfortable, and efficient for the specific routes you ride most.
Frame and Rim Compatibility: The Hard Limits
Before you fall for a specific tire model, face the physical reality of your bike. The frame and fork are the immovable walls of your gravel setup—they dictate what fits, no matter what the marketing claims.
Checking Frame and Fork Clearance
Start with the manufacturer’s stated maximum tire size. That figure isn’t a suggestion; it’s the largest tire the engineers designed around, accounting for wheel flex, chainstay length, and brake caliper position. Yet printed specs can be conservative—or occasionally optimistic—so verify with your own eyes and hands.
Mount a wheel with a tire you already own, or use a caliper to measure the gap between the tire tread and the closest frame point, often the chainstays near the bottom bracket, the seat tube, or the fork crown. You need at least 4mm of clearance on all sides. This isn’t just about avoiding a rub on smooth roads; it’s about mud, sand, and small stones that get flung into those tight spaces. Overlooking this margin can cause paint damage, carbon frame wear, or a sudden lock-up when debris jams between tire and fork. When in doubt, size down.
Matching Rim Internal Width to Tire Width
The rim’s internal width—the distance between the bead hooks—is the second hard limit, just as critical as frame clearance. This measurement shapes how the tire’s casing behaves under pressure. For 35–40mm tires, seek rims with an internal width of 19–21mm. Step up to 40–45mm tires, and you’ll want 22–23mm internal width. For the plushest 45–50mm rubber, pair it with 24–25mm rims.
Why does this matter? A too-narrow rim forces a wide tire into a lightbulb profile, ballooning the center and making it vague and unstable in corners. The tire squirms under load, and you lose the precise steering feel that makes gravel riding enjoyable. Conversely, a too-wide rim flattens a narrow tire into a squared-off shape, reducing the tread’s contact patch and causing it to roll on its edges. You’ll feel a constant, unsettling wobble, and grip drops significantly.
A simple rule: the tire width should be roughly 2 to 2.5 times the rim’s internal width for optimal shape and performance.
This ratio ensures the tire’s sidewalls are supported, the tread profile matches the intended casing shape, and you get predictable traction across loose gravel, hardpack, and pavement. Measure your rim’s internal width before buying anything—it’s a five-minute check that saves you from a costly mismatch.
Terrain and Riding Style: Matching Width to Conditions
Selecting gravel tire width isn’t about one magic number—it’s about syncing your rubber with your route’s reality. A 38mm slick and a 50mm knobby transform the same bike into two different machines. What matters isn’t how aggressive the tread looks; it’s where you actually roll. Let terrain call the shots.
Hardpack, Pavement, and Mixed Commuting
Smooth dirt paths, tractor-packed farm roads, canal towpaths, or a commute mixing tarmac with the odd grassy verge—none of these demand monster truck tires. Stick to 35–40mm. That range rolls quicker, weighs less, and accelerates with snap, perks you feel when holding pace on pavement or grinding into a headwind.
Tread design matters as much as width. A slick or lightly treaded center keeps rolling resistance low on hard surfaces, letting you hum along effortlessly. Small side knobs—file treads or low-profile ramps—offer enough bite for loose patches or dusty corners. You trade some off-road grip versus wider tires, but gain efficiency that makes paved miles feel easy. For a 50/50 road-and-rail-trail split, this is the most versatile zone. It suits bikepacking on well-kept routes where distance matters more than boulder-bashing.
Loose Gravel, Mud, and Chunky Terrain
Flip the scenario. Steep, washboarded forest roads, creek beds with fist-sized rocks, or peanut-butter mud post-storm—narrow tires punish you here, bouncing and sinking. Go 45mm and up. Gravel bikes start feeling like mountain bikes, and that’s a win.
Extra volume tackles two jobs. First, it absorbs shock from sharp edges, allowing lower pressure—25–30 psi—so tires deform over obstacles rather than ricocheting. Second, a wider footprint boosts your contact patch, translating to stability. On loose gravel, a 45mm tire floats instead of digging in and washing out. Aggressive side knobs are essential; they hook into soft soil and bite through mud when leaning into corners. The cost is real: these tires feel draggy on pavement, and tarmac stretches between trails demand more effort. But for technical descents, steep climbs on decomposed granite, or wet, rooty singletrack, the confidence justifies every watt. In truly gnarly conditions—deep mud or rock gardens—50mm-plus approaches mountain bike territory, forgiving sloppy lines with ease.
Advanced Considerations: Tread, Casing, and Tubeless Setup
Tread Pattern and Casing Interaction
Width doesn’t work alone. A 45mm tire with a slick center rolls faster and feels more efficient on hardpack gravel than a 40mm tire wrapped in aggressive knobs. Tread decides where the tire shines; width supplies the volume for comfort and grip. On rough, rocky terrain, prioritize a casing with stronger puncture protection—seek out a robust nylon layer or a branded armor insert beneath the tread. Match the tread to your main surface: slick or lightly file-tread tires suit dry, hardpack roads and packed dirt; file treads with small center knobs handle mixed conditions of dirt, grass, and smooth gravel; and knobby, widely spaced lugs are essential for loose gravel, mud, or steep climbs where bite outweighs rolling speed. A supple high-TPI casing with a slick center in a wide size often beats a stiff, heavily armored narrow tire with big knobs on most gravel routes.
Tubeless Setup and Lower Pressure Benefits
Most gravel riders go tubeless, and for solid reasons. Sealant lets you drop pressure far below what a tube allows—often down to 25–35 psi on wider tires—which boosts traction, control, and comfort over washboard and roots. Wider tires with sealant also cut the risk of pinch flats, since there’s no tube to pinch between the rim and an obstacle. Still, going tubeless demands compatible rims, a proper tape job, quality sealant, and a reliable inflation method, like a floor pump with a high-volume chamber or a compressor. If your wheels aren’t set up yet, budget for a conversion kit, typically €30 to €80 per wheel depending on brand and included valves and tape.
Before converting, verify the rim tape sits correctly and valve stems match your rim depth. Use a sealant made for gravel or mixed conditions—it should seal small punctures fast without drying out too quickly. Start with a conservative pressure range based on your weight and tire volume, then tweak in small steps based on feel and terrain. On a 40–45mm tire, many riders find 28–35 psi front and 30–38 psi rear works well for mixed gravel, but always test and fine-tune. The right setup turns a good tire into a great one, letting width, tread, and casing work as one cohesive system.
Making the Final Choice: Practical Steps and Trade-offs
Measuring Your Current Setup and Clearance
Before committing to new tires, you must know what your bike can handle. Measure your current tire width with a caliper—ignore the sidewall number, as actual widths vary with rim and pressure. Then check your rims’ internal width, which shapes how the tire performs. A wider rim balloons the tire out; a narrow rim pinches it, altering the contact patch. Next, measure frame and fork clearance. Insert a hex key or caliper between the tire and the chainstays, seatstays, and fork legs at their narrowest points. You need at least 4–6 mm on all sides for mud, debris, and wheel flex. Cross-check your measurements with the bike’s manual or manufacturer’s site for the stated maximum. If you’re between two sizes, pick the wider only if clearance is genuinely generous—with less than 5 mm to spare, step down.
Testing and Adjusting Over Time
Spec sheets only reveal so much. The real test is on the roads and trails you ride. Buy a single tire first, or borrow a wheel from a friend, and mount it on your usual loop. Ride the same route several times, varying pressure each run. Notice how the bike behaves on climbs—traction and rolling resistance—on descents, stability and braking grip, and in corners, lean angle and slide predictability. Expect several small pressure tweaks before finding the sweet spot. A tire that feels great at 35 psi on smooth dirt may feel vague and sluggish on loose, deep gravel at the same pressure. Plan to spend a few weeks dialing this in. Resist buying a full set right away; the money saved on an unneeded second tire can fund a quality pump or sealant.
A common mistake is choosing width based on trends rather than terrain. If you rarely ride deep gravel, a 40mm tire beats a 50mm one. The wider option adds weight, rolling resistance, and rotational mass you’ll feel on every paved stretch and climb. Be honest about where you ride, not where you imagine you might someday.
Choosing the right gravel tire width isn’t about finding one “best” number. It’s about balancing your bike’s clearance, rim width, typical terrain, and preferred pressure to get the ideal mix of speed, comfort, and control. Wider tires give you more cushioning and traction on rough or loose surfaces; narrower ones roll faster on hardpack and pavement. Your frame’s clearance sets the ceiling. Start by measuring your actual tire clearance and checking your rim’s internal width, then pick a width that fits most of your riding. From there, experiment with pressure—drop it slightly for rough rides, raise it for smoother ones—to fine-tune the feel. Your perfect setup isn’t a fixed spec; it’s whatever makes you confident and comfortable on every mile.